
Step 1: Install bind DNS on CentOS 8 | RHEL 8
We begin with the installation of the bind and bind-utils package. These packages constitutes dns server and its utilities responsible for querying name servers or DNS servers.
Execute the command:
# dnf install bind bind-utils
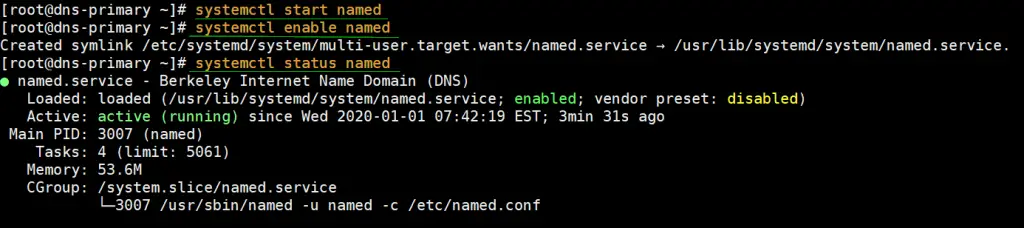
Once successfully installed, start the DNS server using the command below:
# systemctl start named
Next, enable it so that it can kick in even after a reboot
# systemctl enable named
Just to be sure that the service is running as expected, check its status
# systemctl status named
Step 2: Configure bind DNS server
Usually, best practice recommends making a backup of a configuration file before making any changes. This is so that should anything go wrong, we can always revert to the original unedited file. And it’s no different here.
Let’s take a backup of the config file /etc/named.conf
# cp /etc/named.conf /etc/named.bak
Now go ahead and open the file using your preferred text editor. In this case, we’re using vim editor.
# vim /etc/named.conf
Under the ‘Options’ section, ensure you comment out the lines indicated below to enable the Bind DNS server to listen to all IPs.
// listen-on port 53 { 127.0.0.1; };
// listen-on-v6 port 53 { ::1; };
Additionally, locate the allow-query parameter and adjust it according to your network subnet.
allow-query { localhost; 192.168.43.0/24; };
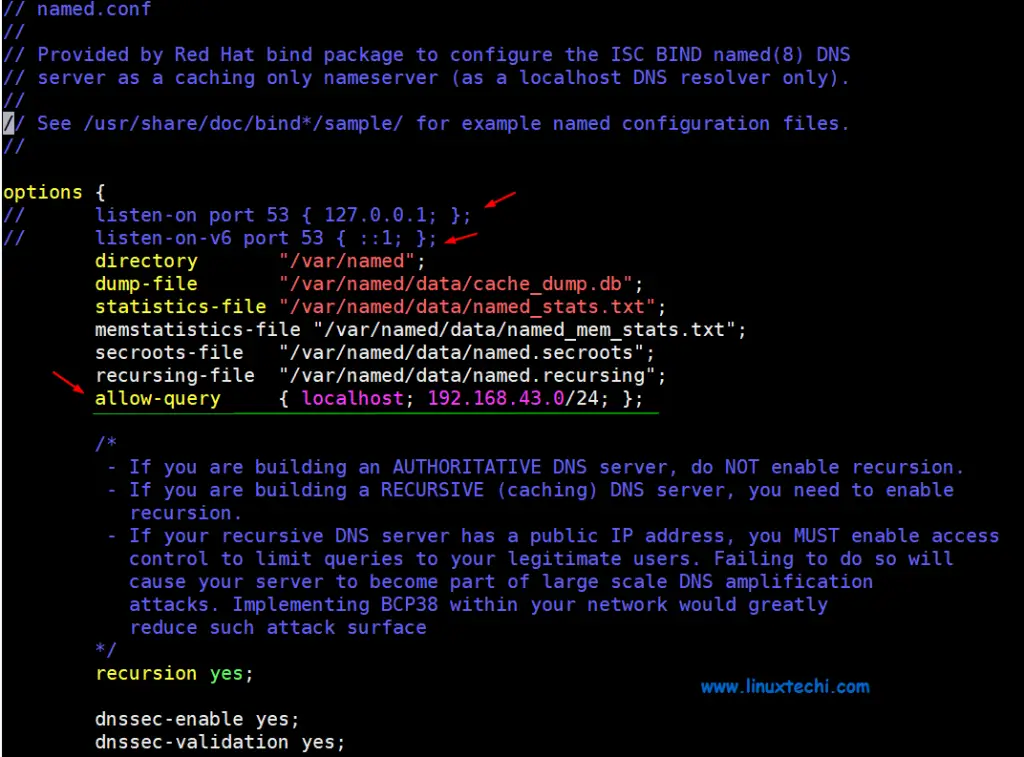
This setting allows only the hosts in the defined network to access the DNS server and not just any other host.